My Pewter Casted Key

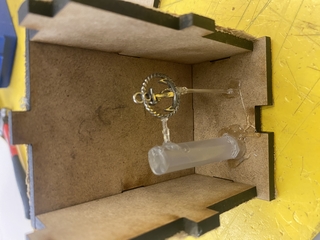
In order to start this project, I first needed to laser cut a box in order to contain the object I wanted to create a mold for. This also meant that it had to be able to contain the mold mix, so the box itself had to have minimal gaps in between its tabs. I decided to create a mold for my necklace, as I was always worried I would lose it, so it would have been nice to have a copy. In order to make the mold negative, I added a stand and a runner to attach to my object. The stand was there to support my necklace and allow for a way for the mold to fill the mold negative, and the runner was there so that there would be minimal contact area between the support and necklace to create a more accurate mold negative.Finally, I added a line under the necklace to allow air to escape, which would reduce air bubbles in the mold.

Polyurethane cast
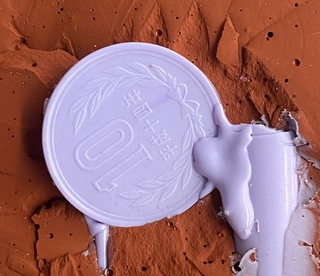
However, when I tried to cast using polyurethane to test the reliability of the mold, the polyurethane was not able to make it all the way through. This may have been due to the runner not creating a solid enough passage which could have cut the pour short. Nonetheless, before I could retry to create a new mold negative, I lost the necklace and had to resort to using another object. I decided to use a coin, using the same setup as described before, but this time not using a runner due to the weight of the coin. When it came time to cast the polyurethane again, it was clear that the coin started to thin near the bottom, which could have been due to the demolding process as the coin was small and parallel to the stand, so it led to many unnecessary cuts and perhaps missing pieces.

Pewter Cast for Key
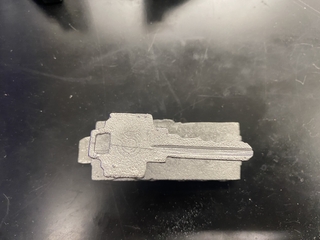
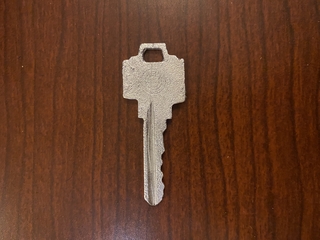
Having failed with making two casts and running out of time for this project, I decided to use a bigger object that I could face perpendicular to the stand so that I could have a much easier time during the demolding process. This can be seen with the key, in which I immediately went into pewter casting for it. The process for pewter casting involves putting powder onto the negative, and then quickly pouring molten pewter into it. However, on my first attempt, the pewter was not hot enough, so it was not able to go all the way through. To solve this problem, I waited for a longer period of time for the pewter to heat up, and then poured the pewter into the mold, and kept pouring until it reached the edge of the box. Reason for this was to create a heat sink, so that the pewter below would be kept hot for longer, and the added pewter on top would act as pressure to push the molten pewter all the way through my mold. This in turn led to a successful cast of my key.

In order to get rid of the stand and air vent attached to my key, I had to use a bandsaw. This allowed me to get the majority off, however, in order to not cut off part of the key I left enough room. For the rest, I used a sand belt to grind away the remaining pieces, leaving me a pewter casted key.