The Design Process
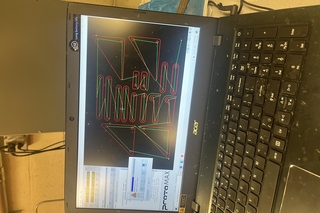
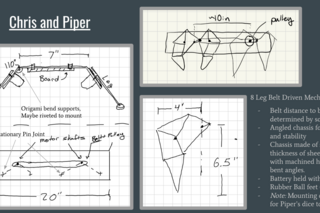
We started our design process through a collaborative brainstorming session. After some brainstorming, I decided on a concept—a long strandbeast featuring four pairs of legs, each angled and linked to two motors via pulleys. I then translated our sketches into a SolidWorks model for a sheet metal chassis. We attempted to fabricate this chassis from sheet metal, cutting and tapping holes for mounting motors, shafts, pulleys, and the circuit board. However, when we attempted to bend our sheet, the metal snapped. We then learned that the sheet metal we choose was not the correct type of metal for bending as it was to brittle. Undeterred, we shifted our approach, using skills we had learned earlier in the class to laser cut the chassis instead. I then modified the SolidWorks design to replace bends with tabs, and used Illustrator to prepare the design for laser cutting, which we then assembled.
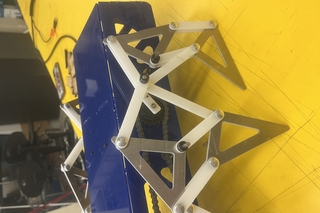
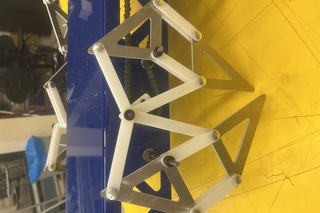
Concurrently, we assembled our leg pairs using the Jensen design and CAD drawings to cut aluminum for the linkages. Given project parameters, we used the water jet to cut aluminum for the leg triangles, then opted for laser-cut acrylic for other components. This experience significantly enhanced my proficiency with the waterjet cutter.
Assembly followed, beginning with the leg pairs. We machined the necessary shafts, securing them with bolts, washers, spacers, and shaft collars. After assembling both the legs and chassis, we attached these components together along with the motors, pulleys, and circuit board. The project required numerous adjustments, testing, and retesting throughout the assembly process. All in all, we were left with a super cool mechanical strandbeast!
