In this project, I was able to construct a case for a USB drive out of machined aluminum and laser cut acrylic. Whilst the final design is a simple case with a key chain loop, I learnt a lot about different engineering design processes.
Boris' Flash Drive

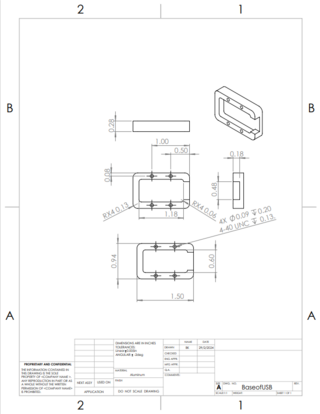
This can be seen with my engineering drawings. I have had little experience with these in the past but I have now seen first hand how they are used to communicate my design intentions with people in my machine shop. Furthermore, I myself used an engineering drawing given to me from my teacher, Will Johnson, to CAD the base of my USB case (the aluminum part). Creating an aluminum part with 4-40 threaded holes, and filleted corners to make a smoother design for the base of the USB case. Therefore, I learnt not only how to make an engineering drawing, but how to successfully create a design using one.

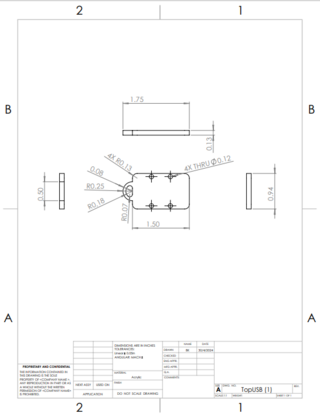
For the top of my design, I originally wanted to also machine it out of aluminum, to give a more homogeneous feel for my case. However, as can be seen from my drawing, the loop for the key chain has an extremely small diameter. This was as large as I could make it without compromising my design, however, this meant that I couldn’t use the CNC machine on it, as the drill piece itself had a larger diameter than the desired cut. Therefore, I decided to cut it out on the laser cutter using a see through ⅛” acrylic. Because of this, my overall case will be more brittle, but in return I will be able to keep my desired design and to make it look unique with a see through finish. Furthermore, I made the key chain loop thick enough to withstand light tugs.In order to determine the neccessary hole sizes, I used a tap chart and navigated to the 4-40 “free” section to find the dimensions so that the screws can fit in both the threaded base holes and my top holes.
This is the final render of my assembly of the top and bottom of my USB in Solid Works

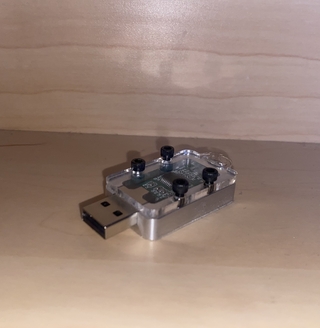
Final Desing of my USB case.
Seeing how the CNC machine operated to cut my base was fascinating. I learnt to set the CNC machine to (0,0) to center the cut of my aluminum to make the rest of the calculations easier, such as setting the x and y coordinate values for one of the corners and holes. In order to tap the holes, I used a t wrench and twisted it by hand, as when using the tap vice it was very easy for it to reach the bottom of the hole and potentially break off, so having a feel of it was necessary. This in turn allowed me to create the finished product of the USB case.
What to Improve?
What seems to be the most problamatic with my design is that the screws stick out quite a bit. This can be impractical with spacing as it adds unnecessary height to the overal case. Therefore, I could instead countersink a flat head screw to the top of my USB case. Resulting in a finish without any screw heads poking out of the USB case and reducing the overall height.